CTG 2014 Week 21: September 20th to September 25th- Root Storage with Lea Scott, Harvesting, & Canning Dem

Topics:

  • Root storage by Lea Scott
  • Canning Demo with Denise

Activities:

  • Harvesting
  • Garden clean-up
  • Canning demonstration with Denise at Ethan Allen Homestead
Class Table
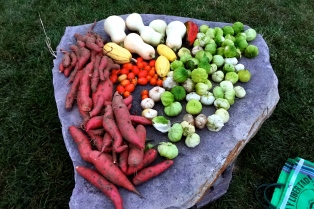
A grand harvest at EA- Photo: Lynne Cardozo

With week 21 coming to an end, it’s clear that fall is on its way, although the weather we’ve been having the past few days says otherwise.  As the CTG program begins winding down, we’ve begun discussing the process of readying the gardens for the off-season, as well as methods on how to preserve the last of our harvests.  On Monday, Lea Scott returned for yet another visit to impart her knowledge on how to properly store root crops, of which there are many right now!  On Wednesday and Thursday, Denise offered more of her invaluable knowledge and experience with canning demos in the Ethan Allen Homestead kitchen, a preservation process that has been widely used for generations.

Squash Workshop
Lea Scott on root storage

Canning Demonstration with Denise:

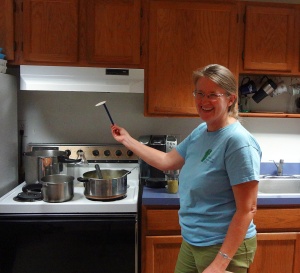
Denise Canning
From the garden to the kitchen, she knows it all!

Canning as a means of food preservation dates back as far as 1806 when Nicolas Appert, a French brewer, found that cooked food inside a jar did not spoil unless the seals leaked.  His discovery was prompted by an ‘award’ promised by the French government offered to any inventor who could devise a new way of preserving food in order to feed the large armies during the Napoleonic Wars.  And you thought canning was just something your mom did…

Canning Class
Fillin’ up
Jars
Don’t forget to sterilize!

Both Wednesday and Thursday evenings, the students gathered in the Ethan Allen kitchen to learn the process with the help of Denise, who had prepared a large amount of tomatillo salsa as the ‘experimental canning substance’.  With Ball jars in hand, the students worked alongside Denise to first sterilize them in boiling water, fill them with the heated salsa, and then cap and seal them in a hot water bath.  Some extremely important tips to take note of when canning is:

  • Always sterilize your equipment!  Due to the potential threat of Botulism, a serious bacterial disease arising from contaminated canning equipment, it is highly important that the canning jars you use are properly sterilized in a hot water bath.  We boiled our jars and lids in separate pots of boiling water for approximately 12 minutes, which is the general rule of thumb for killing any present bacteria.
  • Make sure jar rims stay clean during the filling process.  If you notice a bit of jam, salsa, etc. on the rim of your jar after filling, clean it off with a wet paper towel.  That small bit of food can inhibit the sealing process and thus allow for the canned good to become contaminated or unseal over time.
  • Make sure you read up on the boiling times for the specific food you are canning.  Different foods and different size canning jars require different amounts of times to properly seal in the hot water bath once the lid is on.  The Ball Blue Book of Canning is a great resource for this.  Also, you need to consider time differences between using a simple hot water bath versus a pressure canner.
DSC04268
Lookin’ like a pro already!

Canning can be used for preserving a variety of garden-fresh ingredients, and there’s always the excitement of opening that ‘can of summer’ in the dead of winter when you’re longing for a taste of the gardening season.  Check out the below recipe, which Denise used, to get started on your own canning ventures!

Tomatillo Green Salsa

Classy Salsa
AKA ‘Classy Salsa’ -Photo: Lynne Cardozo

Ingredients:

  • 5 cups chopped tomatillos, roasted
  • 1-½ cups seeded, chopped long green chiles  (can use poblanos, but reduce amount)
  • ½ cup seeded, finely chopped jalapeño peppers
  • 4 cups chopped onions
  • 1 cup bottled lemon or lime juice
  • 6 cloves garlic, finely chopped
  • 2 tablespoon ground cumin (optional)
  • 2 tablespoons dried oregano leaves (optional)
  • 1 tablespoon salt
  • 1 teaspoon black pepper

Methods:

  1. Remove husks of tomatillos, and roast
  2. Prepare peppers:
    1. Slit the peppers and use one of the following methods to remove skins (not necessary but they are tough!):
      1. Oven or broiler method to blister skins – Place chiles in a hot oven (400°F) or broiler for 6 to 8 minutes until skins blister
      2. Range-top method to blister skins – Cover hot burner (either gas or electric) with heavy wire mesh. Place peppers on burner for several minutes until skins blister.
      3. To peel, after blistering skins, place peppers in a pan and cover with a damp cloth. (This will make peeling the peppers easier.) Cool several minutes; slip off skins. Discard seeds and chop.
  3. Remove seeds of jalapenos
  4.  Combine all ingredients in a large saucepan and stir frequently over high heat until mixture begins to boil, then reduce heat and simmer for 2O minutes, stirring occasionally. Ladle hot into clean, hot pint jars, leaving ½-inch headspace. Remove air bubbles and adjust headspace if needed. Wipe rims of jars with a dampened, clean paper towel; apply two-piece metal canning lids. Process in a boiling water canner according to the recommendations in Table 1.
    Table 1. Recommended process time for Tomatillo Green Salsa in a boiling-water canner.
    Process Time at Altitudes of
    Style of Pack Jar Size 0 – 1,000 ft 1,001 – 6,000 ft Above 6,000 ft
    Hot Pints 15 min 20 25

    Note: You may use green tomatoes in this recipe instead of tomatillos.

Source: http://nchfp.uga.edu/how/can_salsa/tomatillo_green_salsa.html 



CTG Week 20: September 13th to September 18th- NFNA Farm Tour, Visit to the Urban Homesteader, & Final Garden Potluck at Ethan Allen

Topics:

  • New Farms for New Americans: Foster Hope, Dignity, and Independence
  • Tour of the Urban Homesteader Founder’s site, led by Ethan Thompson

Activities:

  • Final garden potluck at the Ethan Allen Homestead
DSC04245
I spy a pollinator!

Whew, what a whirlwind of a week for the Community Teaching Program!   Although we have merely two more weeks to go, we surely aren’t slowing down as this week we toured both the New Farms for New Americans (NFNA) farm at the Ethan Allen Homestead and Ethan Thompson’s homesteading operation in Burlington’s Old North End.   That’s not all, this week also saw the last of our Community Teaching Garden potlucks as students, staff, and friends gathered for a yet another delectable, garden-inspired meal midst the lovely gardens.

DSC04242
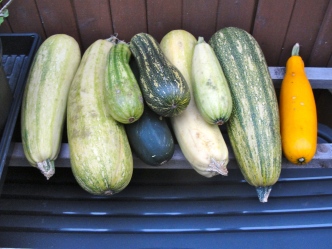
Squash on Squash

New Farms for New Americans: Tour led by Alisha Laramee

On Monday evening, the Ethan Allen group met midst the chilly fall breeze to tour the 6-acre farm that lies just beyond the community gardens at the Homestead.  Alisha Laramee, project manager and outreach coordinator for NFNA, met us alongside the NFNA tool shed to begin the tour.  To begin, she discussed the origins of NFNA as an offshoot from ALlV, a program that assists new Americans from all over the world gain independence in their communities.  NFNA was founded as an initiative to help experienced gardeners and farmers gain access to the land they desired to cultivate culturally-significant foods for their families.   The program operates under three levels of participation:

  •  Access to community gardens and gardening resources
  • Education about farming for a profit in the U.S.
  • Participation in social enterprise sales and launching an independent farm business
Alisha
Alisha Laramee of NFNA
Amaranth
Young amaranth

As it soon became apparent, the participants of NFNA bring a wealth of agricultural knowledge and experience to their new communities, and the organization offers the opportunity and resources for them to take advantage of it.  While touring the plots of some Bhutanese and West African farmers, Alisha pointed out the various crops, from amaranth       to a bitter variety of eggplant, that the participants grow each year.  Often these crops represent cultural staples, and some participants are striving to introduce them into the Burlington market, although communication, market demand, and transportation are constant obstacles.  For more information on the program as well as how you can support it, check out the video below, or visit: http://www.aalv-vt.org/#!farms/crjk

The Urban Homesteader: Ecological Design for Backyard Farmers

Wednesday evening, students gathered in the Old North End to tour the small, yet uniquely productive ‘backyard’ of Burlingtonian Ethan Thompson, founder of the Urban Homesteader.  While studying at UVM, Ethan took a class on permaculture and since then his interest in homesteading and creating closed-loop systems wherever he can has driven his pursuits.  He claims that his small backyard, which measures between 1200-1300 square feet, is where many of the projects he works on first are tested out.

DSC04243
Ethan’s Seed Starting Table

He pointed out the various crops he’s been working with, including sunchoke (Jerusalem Artichoke), two varieties of comfrey (a biomass builder), groundnut, and hearty kiwi, each being placed in specific ‘zones’ that are characterized by their microclimates and the needs of the plants grown there (i.e. sunlight, watering).  He additionally showed off his two rainwater catchment stations, one of which is used to divert accumulated rain towards the borders of the property where a few water-loving elderberry plants reside.

DSC04247
Denise & Diane checking out the future chicken coop

Some of the most interesting projects that Ethan’s been working on include shiitake logs and hugelkultur, a method of growing plants on decaying woody material that also enhances surface area with the 3-dimensional mound it creates.    If you’re interested in the process of inoculating logs to cultivate shiitake mushrooms, check out Ethan’s step-by-step advice here: http://www.urbanhomesteadervt.com/wp-content/uploads/2013/10/Intro-to-Cultivating-Shiitake-Mushrooms-.pdf

Some more of Ethan’s take-home advice:

  • The hardest part of pursing homesteading/permaculture projects is actually doing it!  You have nothing to lose by trying and failing now, the learning process only helps in the future!
  • Seek to implement projects that won’t require constant attention, the key is to think holistically and design closed-loop systems.
IMG_2927
Hugelkultur in the works Photo Credit: http://www.urbanhomesteadervt.com

For more information on the projects Ethan has pursued, as well as the consultation services he provides homeowners to create more sustainable, vibrant, and healthy ecosystems in their own backyards  visit his website at: http://www.urbanhomesteadervt.com/

The busy week came to an end at the Ethan Allen Homestead as both classes gathered for the final potluck midst the very chilly weather.  The recent harvests were certainly the spot-light of the meal as we enjoyed garden fresh bruschetta, roasted tomatillo soup, and an array of scrumptious desserts.  Cheers to a wonderfully delicious potluck with friends, family, and fellow gardeners!

DSC04255
Potluck pow wow
DSC04254
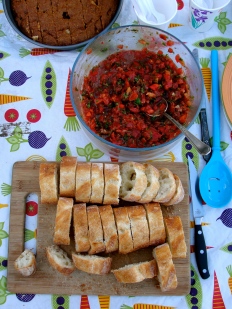
Garden fresh bruschetta

CTG 2014 Week 19: September 6th to September 11th- Seed Saving Talk with Julia Cosgrove, Final Student Presentations, and More Harvesting

 Topics:

  • Seed Saving with Julia Cosgrove

Activities:

  • Final Student Presentations
  • Harvesting garden bounties
  • General garden upkeep
DSC04228
Sporting some fall colors

The brisk weather we experienced this week during our evenings at the Community Teaching Garden was certainly a hint that Autumn is fast approaching.  Although we are already reminiscing about the warm, longer evenings of mid-Summer, we are excited to see many of our root crops getting ready for harvest.  This week, we heard the last of the student presentations, yanked some lovely carrots out of the ground, and heard a wonderful, instructive lesson on seed-saving from the knowledgable Julia Cosgrove.

DSC04229
Garden delights

Seed-Saving with Julia Cosgrove:

Seed-Saving has been a topic of interest that many students have brought up throughout the season, and on Monday evening we were thrilled to finally hear from Julia Cosgrove, an alumnus of the UVM Farmer Training Program, as she shared her acquired knowledge on the topic.  She began her presentation by discussing the two types of seeds any gardener or farmer will encounter, open-pollinated (OP) and hybrid (F1) seeds.  Hybrid seeds are those commonly produced by commercial seed vendors and are the result of crossing two patented parent seeds in order to generate a very specified seed.  Open-pollinated seeds are the type that are desired for those who want to save seeds, especially if you’re interested in saving heirloom varieties.

DSC04233
Julia Cosgrove on Seed Saving

Julia then discussed the importance of controlling pollination, which is key if you don’t want to end up with a strange variety, by being conscious of timing, distance between plants, and the mechanism by which the species needs to pollinate.  Her suggestion, research the specific species that you’d like save, whether is self-pollinating (has male & female parts) or cross-pollinated (requires outside transport like wind/insects), and its life-cycle.  Occasionally people run into the issue of having two varieties flowering at the same time, which can result in undesired pollination.  Some common vegetable families/varieties that have imperfect flowers and need cross-pollination are brassicas, curcurbits, corn, beets, spinach, and grains.  Examples of species with perfect flowers that self-pollinate (the easier seeds to save) are peas, beans, tomatoes, and lettuce.

DSC04230
An organized harvest

After discussing these differences, Julia went on about the importance of selecting the heartiest plants throughout the season in order to end the season with some useful seeds.  While it’s helpful to narrow down your available seed bank by removing any rouging plants (plants with undesirable characteristics/fruits), keep in mind that it’s important to maintain some level of genetic diversity within your given gardening or farming environment.

DSC04234
Discussing self-pollinated species

Finally, Julia commented on the different methods for processing wet and dry seeds, like winnowing and threshing, in order to address germination inhibitors and remove the seeds chaf (outer coat).  Storage is also a key component to seed-saving as correct storage can be responsible for protecting seeds from possible lingering diseases.  Julia’s rule of thumb: the temperature of the container plus the humidity should never exceed 100 and keeping the seeds out of direct sunlight is key.  Thanks for an awesome lesson, Julia!

Unknown
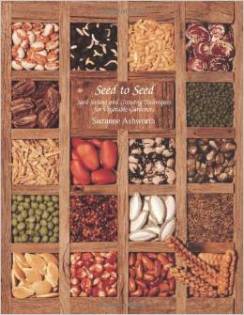
Seed to Seed by Susan Ashworth Photo sourced from Amazon.com

For those of you interested in saving your seeds, check out Seed to Seed by Susan Ashworth or this useful PDF from http://www.seedalliance.org: http://www.seedalliance.org/uploads/publications/Seed_Saving_Guide.pdf

Stay tuned for the week 20 update, its sure to be blooming with with excitement!

CTG 2014 Week 18: August 30th To September 4th- Student Presentations, First Corn from Tommy Thompson & Garden Upkeep

Topics:

  • DIY Root Cellar with Peg
  • Garden Lessons Learned with Diane

Activities:

  • First corn harvest from Three Sisters Garden
  • Garden upkeep
  • Student presentations


DSC04203
‘Fringed Pinks’- A biannual planted by Denise

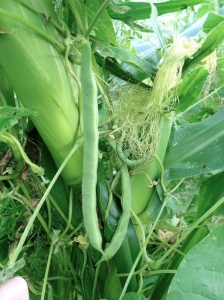
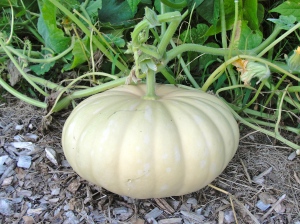
Although this Week 18’s classes were interrupted by the long holiday weekend (we aren’t complaining), there was plenty of activity in the Community Teaching Gardens.  We heard another round of wonderfully crafted student presentations midst some lovely sunshine, and Denise returned from her travels!  On Wednesday, the Tommy Thompson class was fortunate enough to harvest the first corn from the developing Three Sisters Garden, which is now boasting some growing winter squash as well as string beans!  Our  student’s lovely harvests are proof that summer is certainly not over yet!

DSC04206
Sisters 1 & 2
DSC04204
Sister 3!

DIY Root Cellar with Peg:

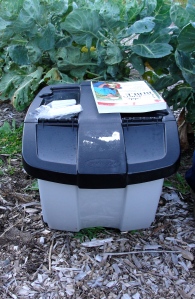
On Wednesday, Peg, a first year in the Tommy Thompson class, imparted her knowledge and experience in creating her own ‘root cellars’ in her garage.  For the past several years, Peg and her husband have had a share in a family friend’s CSA in Fairfax where they often use their ‘credit’ at the end of the season to get a large installment of root veggies for the winter.  For anyone whose had a CSA, sometimes storage can be a challenge, especially if you receive most of your share in one ‘lump sum’.  Thus, out of necessity Peg and her husband devised four small root cellars in their unheated garage made of plastic covered bins, some insulation material, a horse blanket, and an electric blanket to store their harvest throughout the cold months.

DSC04211
Peg on ‘Root Cellars’

Their system has developed over the years, and all of the bins are encompassed by the insulation material and blankets in order to prevent freezing.  In order to retain moisture in the bins of the veggies that require such conditions, Peg places a layer of play sand.  Additionally, the temperature of the bins are carefully monitored with the help of a sensor thermometer, with the sensor device being placed in one of the bins and the other half inside the house.  Once the temperature inside the bins reaches close to freezing, the thermometer will begin flashing, thus alerting Peg that she needs to switch on the electric blanket for a period of time to generate some heat.  Although it can be challenging to store root veggies properly without an extra fridge/freezer in the cold Vermont winters, Peg has devised an interesting alternative!  Thanks for sharing!

DSC04213
Who knew it could be so simple?!

Garden Lessons Learned with Diane:

Following Peg’s presentation, Diane shared some of the experimentations and experiences she had this season in her other plot at the Tommy Thompson garden.  She practiced with digging raised beds, growing cauliflower, and different methods for controlling pests.  The following are some of the valuable lessons she learned, which she will definitely consider in following gardening seasons:

  • Test your soils!  It’s cheap and will take some of the guessing out of whether your plants are having watering or nutrient issues.
  • Plant peas and spinach as early as possible for first harvest, mid-April is a good time as long as there are no predicted frosts.
  • Raised beds are good for crops like sweet potatoes, which generally flourish in warm soils, but may cause difficulties for other crops.  Think about planting other plants that enjoy this same environment if you’re going to use raised beds, and don’t forget to consider the increased drainage!
  • When planting cauliflower, blanching is key!  In order to achieve the white hue of a cauliflower head, the crown must be blanched by loosely enclosing the leaves around it.  This will prevent the crown from turning unattractive colors.
  • Aphids, a tiny garden-pest, are often extremely infuriating for a gardener to deal with.  However, Diane found they really dislike potassium and completely rid her plants of them by placing banana peels around the base of her growing sweet potatoes.  It’s a cheap and ecologically sustainable all you need to do is eat bananas!!
DSC04216
Diane presenting

It was inspiring to hear Diane’s presentations, especially as she spoke the things she’d like to try/adjust for next year.  We’re excited to see where her acquired gardening knowledge takes her in the growing seasons to come!

DSC04209
Harvesting corn with Ayla!

With 18 weeks down and 4 to go, the CTG program is entering its final stretch of the growing season.  While we’re certainly sad that this year’s cohort will soon be ‘graduating’, we are determined to cherish and celebrate our remaining time and harvests as a growing community of gardeners!

Peg’s Fresh Tomato Sauce

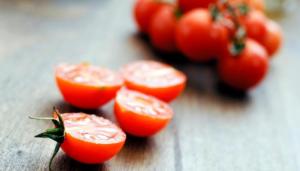
Wondering what to do with your plentiful harvest of fresh cherry tomatoes?  Well look no further!  This recipe, shared by CTG student Peg, is sure to add some serious flavor to any pasta dish and leave your taste buds tingling!

Fresh Tomato Sauce with Cherry Tomatoes and Olives

cherrytomatoes
Source: http://www.splendidtable.org

Ingredients

  • 1 1/2 pounds cherry tomatoes
  • 3 tablespoons olive oil
  • 4 cloves garlic, minced
  • 1/4 teaspoons red pepper flakes
  • 4 – 6 anchovies, finely chopped/mashed or 1 T anchovy paste
  • 1/2 teaspoons dried oregano or 2 t fresh oregano, finely chopped
  • 1/4 to 1/2 cup tomato sauce (optional)
  • 1/2 cup olives (black or kalamata) – sliced
  • 3 to 4 tablespoons capers – chopped
  • Fresh parsley or basil – 1/4 cup
  • Cooked pasta

Instructions

  1. Roughly chop the cherry tomatoes in a food processor and place in a colander over a bowl to catch the tomato juice.
  2. Let drain 5 – 10 minutes, press on the chopped tomatoes to get as much juice as possible – hopefully around 2/3 – 3/4 cup.
  3. Put olive oil, garlic, red pepper flakes, anchovy paste and oregano in a skillet, saute until garlic is golden.
  4. Add tomato juice and tomato sauce (if desired – this will make the sauce thicker with a little more body) and saute for 3-5 min until reduced by half.
  5. Add chopped cherry tomatoes, olives and capers and toss until heated through.
  6. Add fresh herbs and serve over pasta.  Sprinkle with parmesan cheese.
Easy and yummy!

Alyssa’s Fermentation Recipes

While sharing her acquired knowledge on fermentation with the Ethan Allen class during her project presentation, Alyssa provided some absolutely delightful treats to really get a ‘taste’ of what she’d be learning.  As promised, here are the recipes that Alyssa utilized when completing her project.  Enjoy!

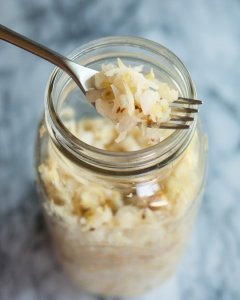
Homemade Sauerkraut in a Mason Jar

52002742fb04d604c60057d2._w.540_s.fit_
Makes 1 to 1 1/2 quarts

Ingredients

  • 1 medium head green cabbage (about 3 pounds)
  • 1 1/2 tablespoons kosher salt
  • 1 tablespoons caraway seeds (optional, for flavor)

Equipment

  • Cutting board
  • Chef’s knife
  • Mixing bowl
  • 2-quart widemouth canning jar (or two quart mason jars)
  • Canning funnel (optional)
  • Smaller jelly jar that fits inside the larger mason jar
  • Clean stones, marbles, or other weights for weighing the jelly jar
  • Cloth for covering the jar
  • Rubber band or twine for securing the cloth

Instructions

  1. Clean everything: When fermenting anything, it’s best to give the good, beneficial bacteria every chance of succeeding by starting off with as clean an environment as possible. Make sure your mason jar and jelly jar are washed and rinsed of all soap residue. You’ll be using your hands to massage the salt into the cabbage, so give those a good wash, too.
  2. Slice the cabbage: Discard the wilted, limp outer leaves of the cabbage. Cut the cabbage into quarters and trim out the core. Slice each quarter down its length, making 8 wedges. Slice each wedge crosswise into very thin ribbons.
  3. Combine the cabbage and salt: Transfer the cabbage to a big mixing bowl and sprinkle the salt over top. Begin working the salt into the cabbage by massaging and squeezing the cabbage with your hands. At first, it may not seem like enough salt, but gradually, the cabbage will become watery and limp — more like coleslaw than raw cabbage. This will take 5 to 10 minutes. If you’d like to flavor your sauerkraut with caraway seeds, mix them in now.
  4. Pack the cabbage into the jar: Grab handfuls of the cabbage and pack them into the canning jar. If you have a canning funnel, this will make the job easier. Every so often, tamp down the cabbage in the jar with your fist. Pour any liquid released by the cabbage while you were massaging it into the jar.→ Optional: Place one of the larger outer leaves of the cabbage over the surface of the sliced cabbage. This will help keep the cabbage submerged in its liquid.
  5. Weigh the cabbage down: Once all the cabbage is packed into the mason jar, slip the smaller jelly jar into the mouth of the jar and weigh it down with clean stones or marbles. This will help keep the cabbage weighed down, and eventually, submerged beneath its liquid.
  6. Cover the jar: Cover the mouth of the mason jar with a cloth and secure it with a rubber band or twine. This allows air to flow in and out of the jar, but prevent dust or insects from getting in the jar.
  7. Press the cabbage every few hours: Over the next 24 hours, press down on the cabbage every so often with the jelly jar. As the cabbage releases its liquid, it will become more limp and compact and the liquid will rise over the top of the cabbage.
  8. Add extra liquid, if needed: If after 24 hours, the liquid has not risen above the cabbage, dissolve 1 teaspoon of salt in 1 cup of water and add enough to submerge the cabbage.
  9. Ferment the cabbage for 3 to 10 days: As it’s fermenting, keep the sauerkraut away from direct sunlight and at a cool room temperature — ideally 65°F to 75°F. Check it daily and press it down if the cabbage is floating above the liquid.Because this is a small batch of sauerkraut, it will ferment more quickly than larger batches. Start tasting it after 3 days — when the sauerkraut tastes good to you, remove the weight, screw on the cap, and refrigerate. You can also allow the sauerkraut to continue fermenting for 10 days or even longer. There’s no hard and fast rule for when the sauerkraut is “done” — go by how it tastes.While it’s fermenting, you may see bubbles coming through the cabbage, foam on the top, or white scum. These are all signs of a healthy, happy fermentation process. The scum can be skimmed off the top either during fermentation or before refrigerating. If you see any mold, skim it off immediately and make sure your cabbage is fully submerged; don’t eat moldy parts close to the surface, but the rest of the sauerkraut is fine.
  10. Store sauerkraut for several months: This sauerkraut is a fermented product so it will keep for at least two months and often longer if kept refrigerated. As long as it still tastes and smells good to eat, it will be. If you like, you can transfer the sauerkraut to a smaller container for longer storage.

Notes

  • Sauerkraut with Other Cabbages: Red cabbage, napa cabbage, and other cabbages all make great sauerkraut. Make individual batches or mix them up for a multi-colored sauerkraut!
  • Canning Sauerkraut: You can process sauerkraut for longer storage outside of refrigeration, but the canning process will kill the good bacterias produced by the fermentation process. See this tutorial from the National Center for Home Food Preservation for canning instructions.
  • Larger or Smaller Batches: To make larger or smaller batches of sauerkraut, keep same ratio of cabbage to salt and adjust the size of the container. Smaller batches will ferment more quickly and larger batches will take longer.
  • Hot and Cold Temperatures: Do everything you can to store sauerkraut at a cool room temperature. At high temperatures, the sauerkraut can sometimes become unappetizingly mushy or go bad. Low temperatures (above freezing) are fine, but fermentation will proceed more slowly.


Looking for a something with a little more spice?  The following recipe for fermented tomato salsa is muy delicioso!

Fermented Tomato Salsa

wide-jar

Ingredients:

  • 2.5-3 lbs of tomatoes of choice
  • 1-2 onions (yellow, white, or red)
  • Fresh Cilantro to taste (I use 1/2 cup or more)
  • 1 lemon, juiced
  • 2-3 limes, juiced
  • 2 tablespoons celtic salt
  • Spices to taste ( I use salt & pepper only, but cumin, oregano, or powdered chili could be added)
  • Peppers (sweet or spicy…I use jalapeno but sweet peppers work well too if you don’t like spicy!)

Instructions:

  1. Chop tomatoes, peppers, onion and cilantro (garlic if you decide to use it)
  2. Toss all ingredients into large bowl
  3. Add the citrus juice
  4. Add salt & pepper (other spices at this time, if you like)
  5. Pour into quart or half gallon size mason jars and cap
  6. Leave on the counter for approximately 2 days
  7. After fermentation is complete, store in refrigerator for up to 9 months